

Kobe Dress | A Self-Covered Button
Frocktails, ahoy!
To the delight of sewists living anywhere in the Wellington region, June heralded the inaugural Wellington Frocktails Event! We’ve seen it on Instagram posts from Melbourne to Seattle and only wished it could be here, until one amazing woman took it upon herself to make Frocktails in Aotearoa a reality! Sandra Julian of the Wellington Sewing Bloggers Network has kicked off what will hopefully be a reoccurring Frocktails, hosting an event in each Auckland and Wellington this winter.
I just about popped with excitement at the thought of a Frocktails event in Wellington, and inevitably went into a spin about what I should make. A By Hand London Anna? A Decades of Style 1940s Point Made Gown? Or something a little left-of-field like a glam jumpsuit? And should I use this crepe de chine, or this rayon, or this jacquard? The possibilities! The plans! The tailspin!
Overwhelmed with work as May was, I had all the time to go through every possible combination in my imaginarium but no time to commit to any, until about a week before the event when I finally settled on the Kobe Dress from Papercut Patterns, made from this glorious silk crepe de chine from Tessuti Fabrics (via a swaps table at Made Marion). I also decided to make a matching belt, a self-covered button for the back and—for that high-drama Frocktails fun—I decided to make a headscarf!
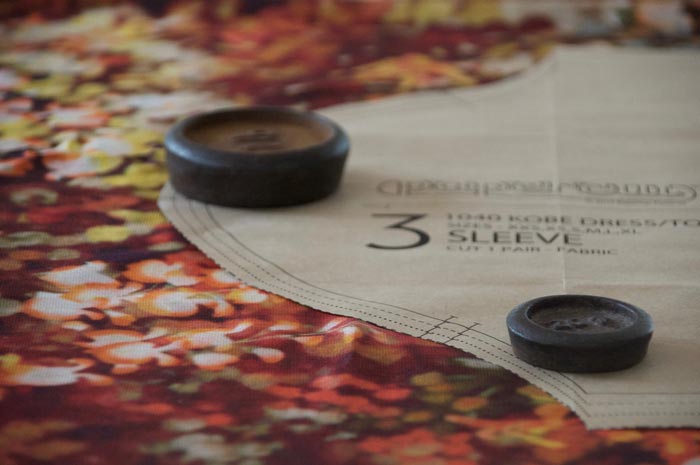
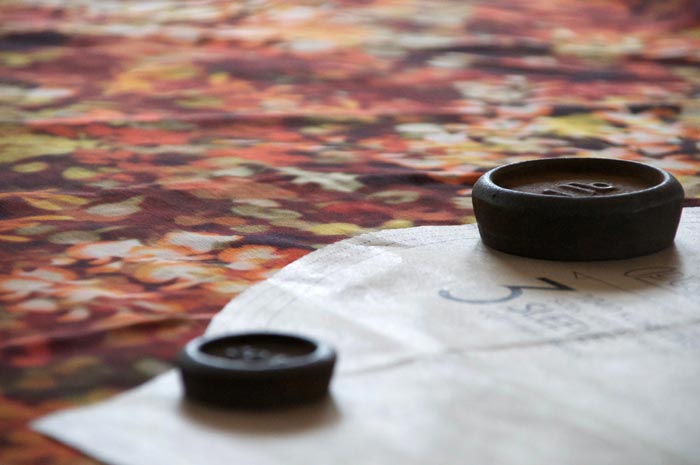
Fun fact, the inspiration for the A Self-Covered Button section of my blog comes from this wee button.
Preparation
To prepare for embarking on the trickiest thing I’ve made (that is since I naively decided a self-drafted silk dress after not sewing for fifteen years was a good idea) I listened again to Episode 37 from Love to Sew: Up Your Sewing Game! This is a great little pep talk with lots of good tips if you’re wanting to stretch your abilities.

Armed with my new knowledge, I updated some of my tools: new blade for my rotary cutter, fresh microtex needles and silk pins, a straight stitch needle plate and my trusty old friend, the walking foot. If you’re working with a delicate fabric I’d highly recommend gathering as many of these tools as you can, but if I had to choose only two, I would definitely go with a fresh pack of needles and investing in a walking foot. From sewing knits and silks to top stitching jeans, this foot is such a good, versatile workhorse and well worth the investment.
It took a lot of loin-girding to cut into this extravagantly beautiful fabric, but I’m so delighted I took the plunge. Although it hasn’t been in my stash for a very long time, it had been in there long enough for me to become quite risk-averse about it—was this the right project for it, really? It was a real lesson in using the fabric in your stash that you love! Sure, it may not have worked out but it is only fabric, and the pleasure I get out of wearing this dress is far greater than looking at it in my cupboard and loving it, but feeling stressed about how to use it.
With the first half of my year being incredibly busy on the professional front, I decided to take a stay-cation in early June, and with that time to lavish lots of beautiful finishing techniques on this make, and I say with a great deal of pride that her guts are loooverly! I have included a lot of detail photos in this post; if you click on the photos they will pop out to larger images if you want a closer look.
Process and Progress
To step you through it: I machine stitched the bias binding for the front neckline on the first pass, but then hand-stitched it when I folded it around to the front. The hand-stitching is invisible from the front, but you can see the stitching inside (which I rather like). The back the neckline was simply machine sewn, as it didn’t require any special finishing.
For all the other internal seams—shoulders, sleeves, side seams—I used French seams. A point on this: Papercut Patterns use a 3/8” seam allowance, and I didn’t think to add any to the seam allowance, meaning the French seam was … doable, but a little scary. For the shoulder seam (where I was most concerned about the fit) I sewed each pass at 3/16” with minimal trimming (yikes!). For the arm and side seams, I treated it as I would a 5/8” hem (for an excellent tutorial on this I would recommend the one at Grainline Studio, here and here). I do have some notes on the fit shortly, which might mean you could maaaybe use a 5/8” seam on this dress throughout without materially affecting the fit. Although! —Proceed with caution and if you’re a beginner, add to the seam allowance!


I also hand-rolled all the hems, and here the second reason I made the scarf comes to the fore: it was an excellent chance to practise the technique of hand-rolling a hem before doing it on the dress. I used this tutorial from Beckford Silk and although I’m sure there are others, this one was very thorough. As you’ll see from the video you have to keep tension on the fabric by pinning it to a surface as you’re rolling the hem, and here I really recommend using your ironing board: pin it to that baby, make yourself a cup of tea, and settle in for some therapeutic hand stitching. I think my hand-rolling could still use some work, especially around getting the roll to remain even, but as a first attempt I’m very pleased with the result.


It was a bit of a trick getting the hand-rolling to marry up with the French seam on the split and I was very reluctant to cut into the fabric to release it from the French seam (as some tutorials suggest), so I just kind of worked and caught the fabric with hand-stitches. It might not be perfect but it does the job perfectly adequately. This really was done all by touch, by responding to the fabric and taking it very slowly, with little hand-stitches. I’ve tried to show this junction in the photos below.


The headscarf was a simple matter of cutting a large square, about 90cm, and then hand-rolling the hem, as mentioned above. Starching the silk helped keep the ‘puff’ of it in place while I was wearing it. There are oooodles of videos and sites that tell you various ways to tie a headscarf, and it just takes a little practise and persistence to get it to work.


And finally, the little accoutrements: a self-covered button and a waist tie. Self-covered buttons are quite simply made and, I feel, lend a garment a beautiful, vintage feel. I used an 11mm set from Trendy Trims, which has clear instructions, was easy to assemble and doesn’t require specialised tools. To get the silk to play nice I starched it a little, then used a running stitch about 1/8” in from the edge of the cut circle of fabric in which to gather it around the front of the button. This wasn’t a direction from the notion kit, just some past knowledge from my quilting days, and it gives a very even finish. I snapped the button back in place before trimming my gathering thread, as this helped keep the front of the button nice and smooth until everything was locked in place.


I prepared the cover for the waist tie as you would do with any sort of strap, folding a length of silk right sides together, stitching its length and then feeding it through itself with a loop turner. I used a length of 1/4” piping cord for the waist tie, and sewed a slightly larger channel for it from the length silk, then feeding the piping cord through using a safety pin. The cord ends were pilfered from another garment, but I really love the shape of these cord ends and would love to source more (if you have any good tips!). I know that I haven’t used them quite correctly (the knot should be hidden within the cord end) but I like them like this regardless—one of the many pleasures of making your own clothes, rule breaking!


Fit and Finish

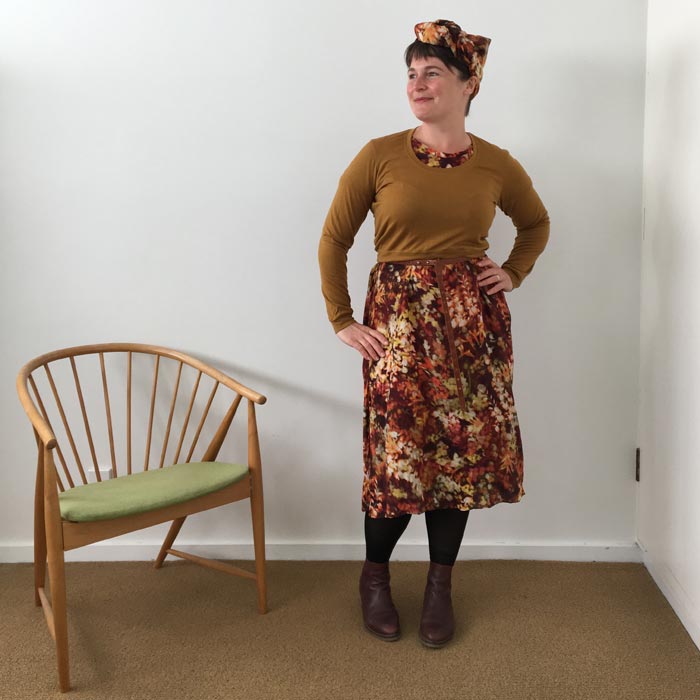
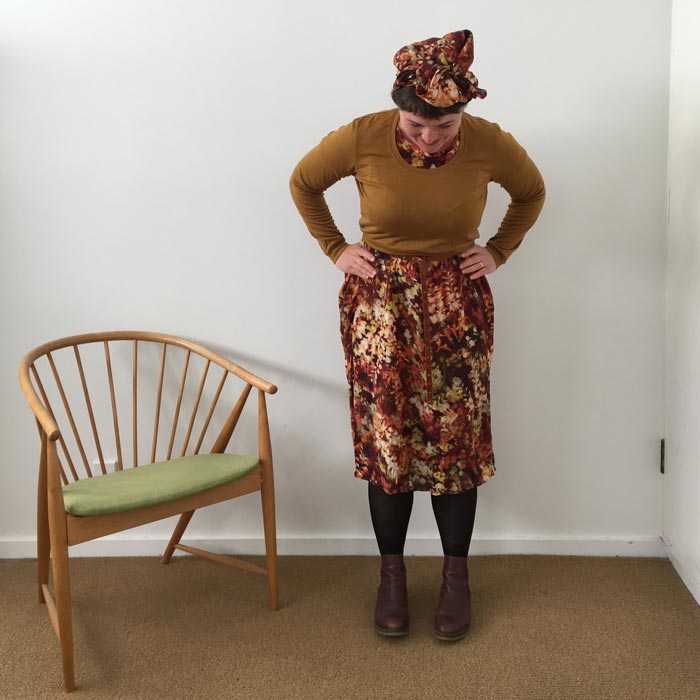
Based on my measurements I’m somewhere between a medium and a large for Papercut Patterns sizing, but from past experiences (when I have found the garments are too big for me and requiring a lot of work to size down) I decided to go with a medium. Looking at the photos, and knowing the feel of wearing the dress I think I could have easily sized down to a small. You can see how far the armscye sits off my shoulder in the photos below—significantly lower than the product photos. I also found that the opening at the back would … drift down and show my bra a little, which you can see in this photo. I’m not sure if that’s a sizing issue, but it is something to watch out for if you’re making this dress.
Although oversized is the rage at the moment, I often find that Papercut Patterns are too oversized for me and I struggle a little bit with their patterns for this reason. I would love to see them use a broader range of finished garments measurements on their patterns—with those measurements I’m able to gauge off my existing garments and figure out, with less risk, whether I really need to be cutting a large. In saying this, though, I love their designs! They’re fresh and clever with beautiful lines and interesting techniques, so even though I have a minor gripe with how much Finished Garment information they put out given their sizing, for me it’s worth persisting because I wear my Papercut garments c-o-n-s-t-a-n-t-l-y!
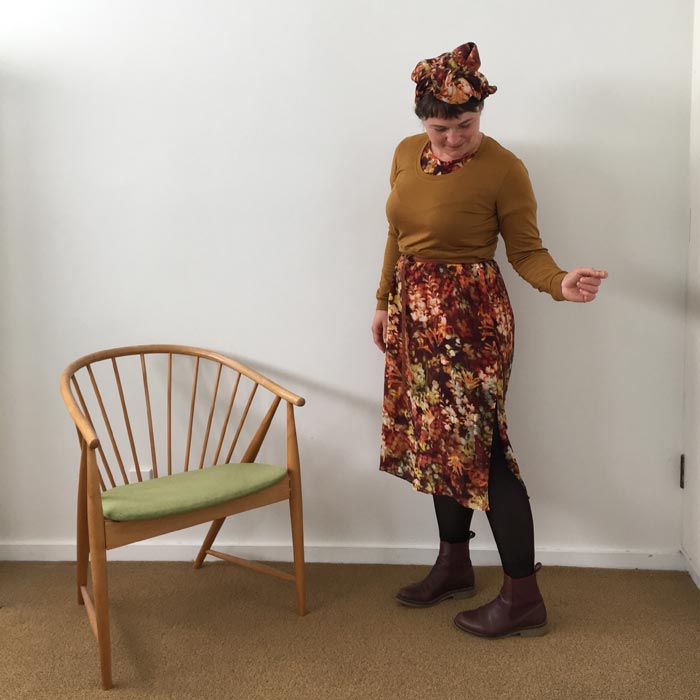
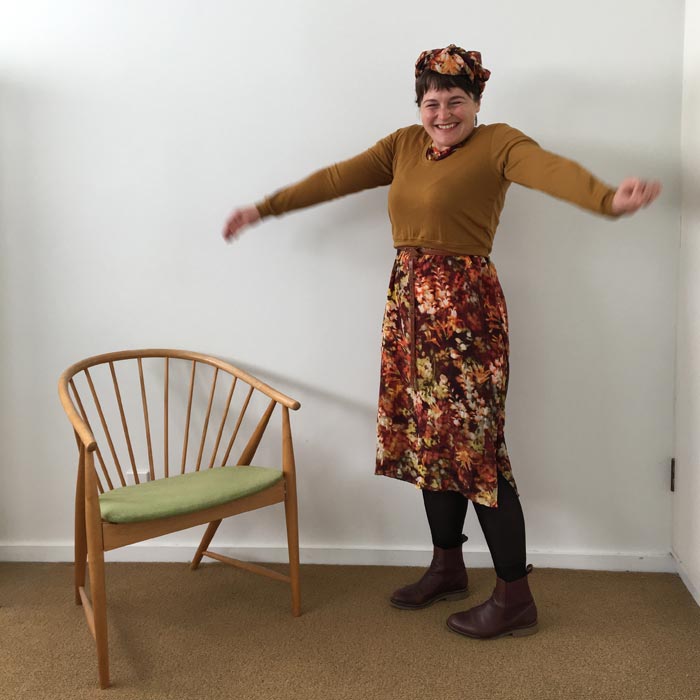
And this dress is no exception: even though it’s pretty dressy and my daily life doesn’t require dressiness, even though it’s been the depths of winter and there’s not a lot to it, I’ve worn the dress and headscarf a few times since I completed it, styling it with my ochre Ondee jumper, stockings and boots. And now for the results…
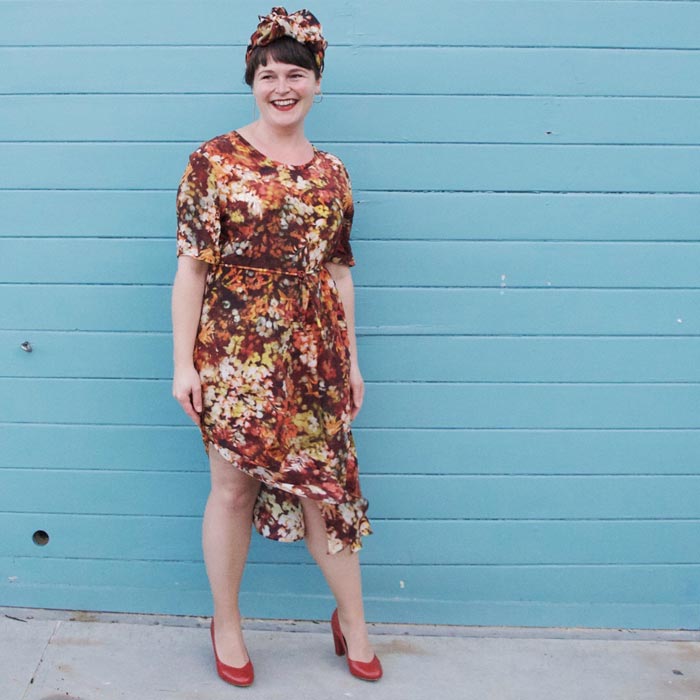
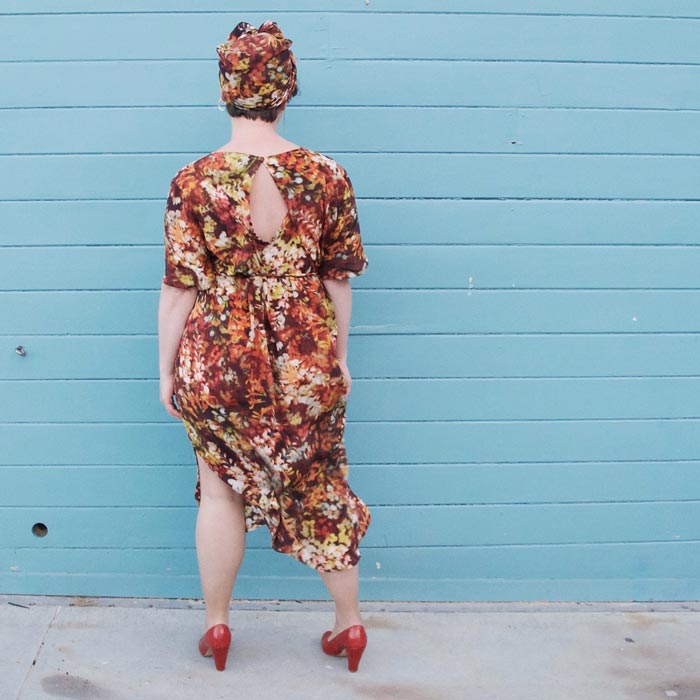
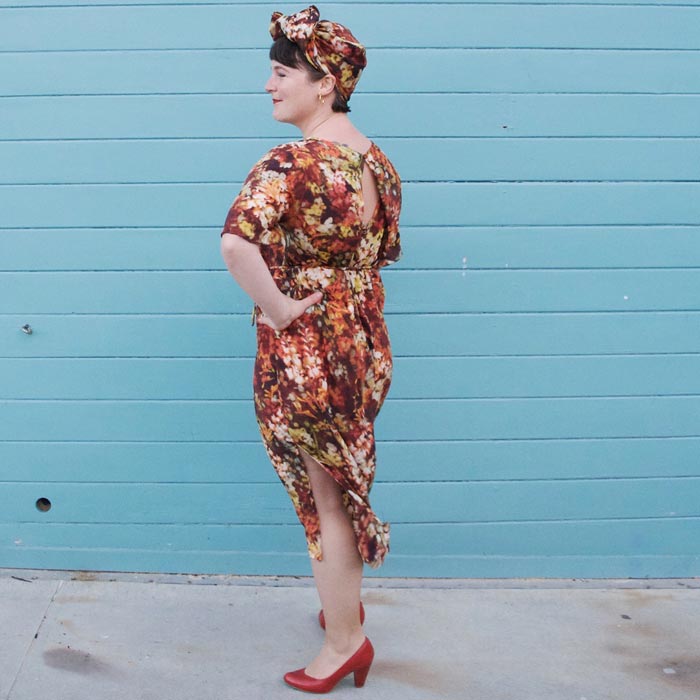
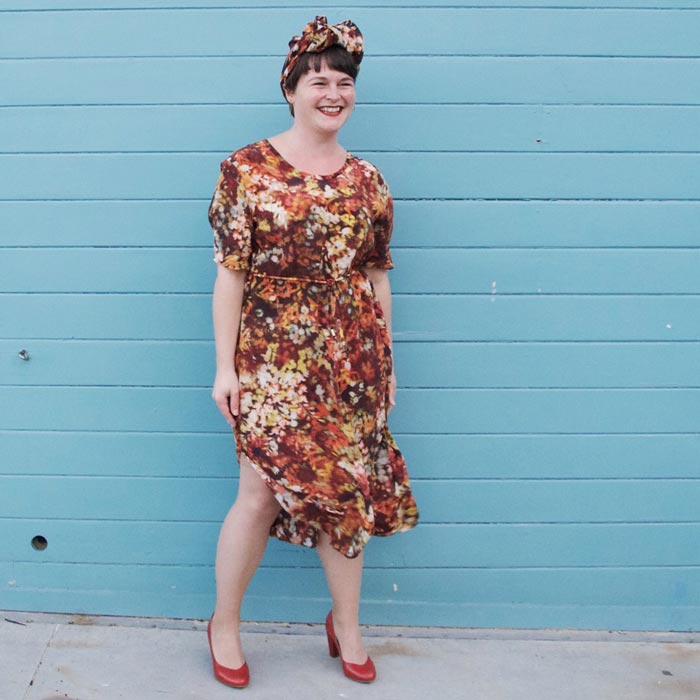
This is how I styled it for Frocktails and I felt amazing in it! I swished around with a prosecco in hand feeling fabulous. It was so lovely to make a garment that’s quite impractical as a lot of the clothes I’ve made in the past two years have been pretty solid work-horses in my wardrobe. So having the experience of sewing a party frock was very special.
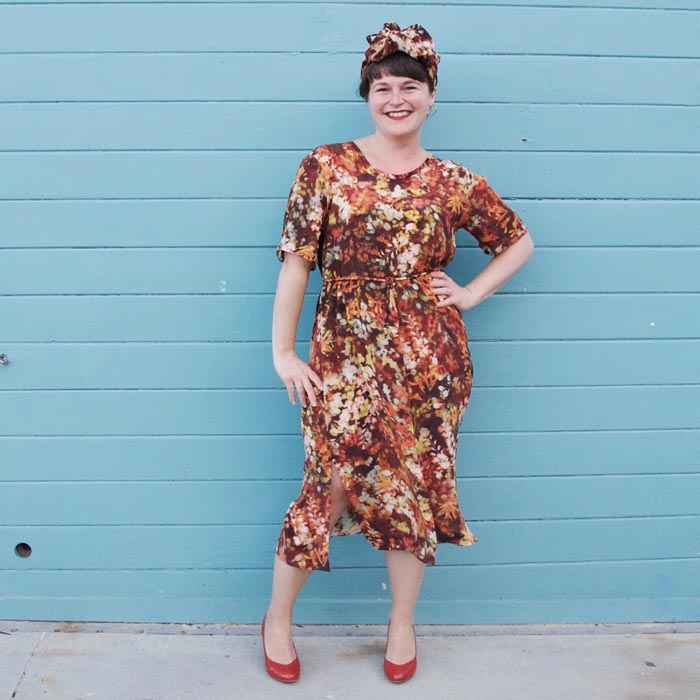
But then, of course, with a dress like this I didn’t want it to languish in my wardrobe! So teaming it with a jumper, boots and one of my favourite RTW belts has been a great way of getting a little more wear out of my Kobe. And here she is styled for dressy work days…
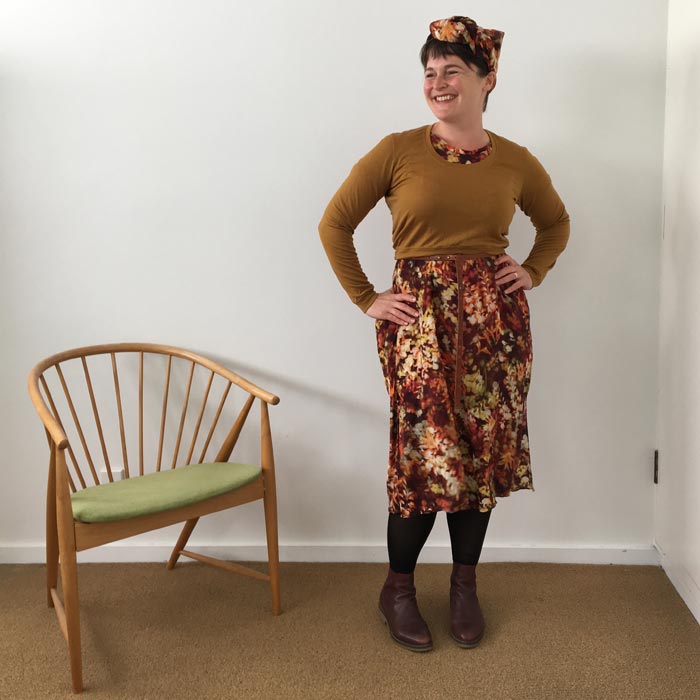
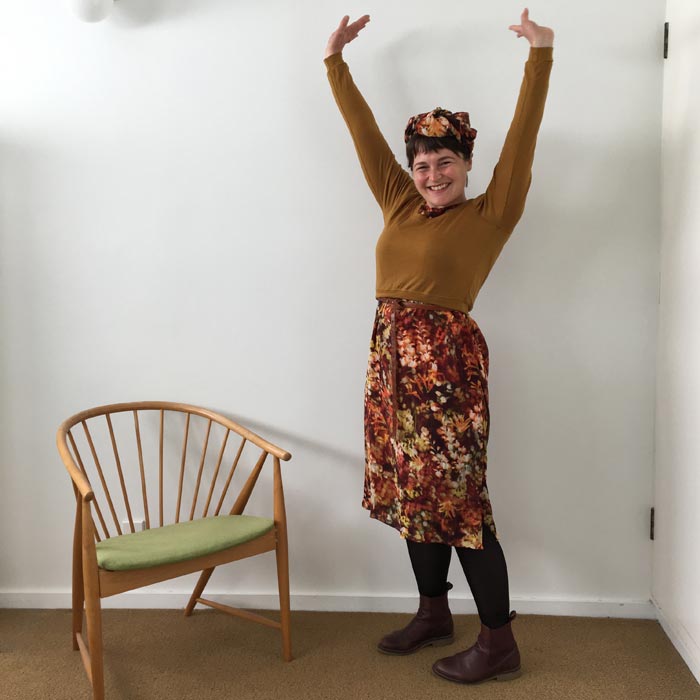
I wore this outfit for a PhD event (where, as a cohort, we present our recent research to each other) and also for a meeting I had to fly to Auckland for and, once again, felt killer. (The airport security guy even said, “great outfit!” to me when I went through the scanner, hehehe!) These photos were taken by my lovely chap, and I was feeling a bit embarrassed about the situation so kind of rushed putting the outfit on; looking at the photos I wish I had pulled the dress a bit straighter, tidied up the sleeves and popped on some red lippy, but you get the idea :-).
This outfit has given me the idea of some lux, beautiful silk skirts for summer, because, why not, hey?
But to briefly return to Frocktails before I finish (well done if you’ve made it this far! This is a looong post!)


Frocktails was such a great night! It was the one place in Wellington where you would find a bunch of people looking at each other’s busts and bottoms, and fondling the fabric in each other’s garments without bartenders having to intervene. I met some gorgeous people, oooohh-ed and aaaaahh-ed over some extraordinary outfits, got a little drunk and just generally had a blast! So I’d strongly encourage you to attend the Frocktails in your city … or maybe start one up yourself? The lovely Sandra is in the foreground of the middle photo in the beautiful navy gown, looking all modest as we all cheered on her work putting together Wellington’s, indeed Aotearoa’s, inaugural Frocktails! I’m so delighted to have been a part of it, thanks so much, Sandra.
If you’re in Aotearoa New Zealand and are keen to hear about Frocktails and other sewcial events, check out Sew Social NZ here, or follow Sew Social NZ on Instagram or Facebook.
(Frocktails Wellington photos are Sew Social photos, and used with Sandra’s permission. Thanks, Sandra!)


